
Ar 15 Build: A Comprehensive Guide for Aspiring Gun Enthusiasts
Building your own AR-15 rifle can be an incredibly rewarding experience. Not only does it allow you to customize your firearm to your specific needs and preferences, but it also gives you a deeper understanding of the mechanics and functionality of the weapon. Whether you’re a seasoned gunsmith or a beginner looking to dive into the world of firearm construction, this guide will walk you through the process step by step.
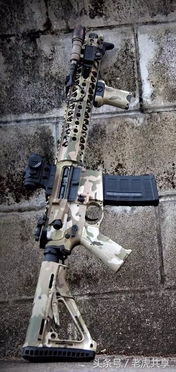
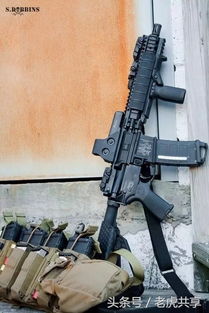
Choosing the Right Parts

Before you start building your AR-15, it’s crucial to select the right components. Here’s a breakdown of the essential parts you’ll need:
| Part | Description |
|---|---|
| Receiver | The receiver is the central component of the rifle, housing the bolt carrier group and magazine. It comes in two types: mil-spec and commercial. |
| Bolt Carrier Group (BCG) | The BCG is responsible for cycling the rounds. It includes the bolt, cam pin, firing pin, and gas key. |
| Barrel | The barrel determines the rifle’s caliber and length. Common options include 5.56mm and .223 Remington, with lengths ranging from 16 inches to 20 inches. |
| Handguard | The handguard provides a comfortable grip and protects the barrel. It comes in various materials, such as aluminum, polymer, and carbon fiber. |
| Stock | The stock adjusts the rifle’s length of pull and helps with recoil management. It comes in various types, including collapsible, fixed, and telescoping stocks. |
| Trigger | The trigger is the mechanism that releases the hammer or striker, causing the firearm to fire. It’s important to choose a trigger that suits your preferences and shooting style. |
| Magazine | The magazine holds the rounds and feeds them into the chamber. It’s essential to choose a magazine that is compatible with your rifle’s caliber and capacity. |
When selecting these components, consider factors such as quality, compatibility, and your budget. It’s always a good idea to read reviews and consult with experienced builders to ensure you make the right choices.
Assembling the Rifle
Once you’ve gathered all the necessary components, it’s time to start assembling your AR-15. Here’s a step-by-step guide to help you through the process:
- Attach the handguard to the receiver using the appropriate mounting hardware.
- Install the barrel into the handguard, ensuring it’s properly aligned.
- Attach the bolt carrier group to the receiver, making sure the gas key is securely in place.
- Install the firing pin and cam pin into the bolt carrier group.
- Insert the bolt into the bolt carrier group, ensuring it’s properly seated.
- Attach the stock to the receiver using the appropriate mounting hardware.
- Install the trigger and hammer into the receiver.
- Insert the magazine into the magazine well.
- Perform a function check to ensure everything is working correctly.
Remember to follow the manufacturer’s instructions for each component and use the appropriate tools for assembly. It’s crucial to take your time and ensure that each step is completed correctly to avoid any potential issues.
Finishing Touches
After assembling your AR-15, there are a few additional steps you can take to ensure it’s in top condition:
- Break-in the barrel: Fire a few rounds to help the barrel settle into its final shape. This can improve accuracy and reduce wear on the barrel.
- Apply lubrication: Use a high-quality lubricant to coat the moving parts of the rifle, such as the bolt carrier group, gas key, and trigger assembly.
- Adjust the sights: Ensure that your sights are properly aligned and adjusted for your