
Assembling an AR-15: A Comprehensive Guide for You
Assembling an AR-15 can be a rewarding and satisfying experience. Whether you’re a seasoned gun enthusiast or a beginner, understanding the process can help you build confidence and ensure a safe and enjoyable experience. In this guide, we’ll walk you through the steps of assembling an AR-15, covering the necessary tools, parts, and safety precautions.
Understanding the Basics

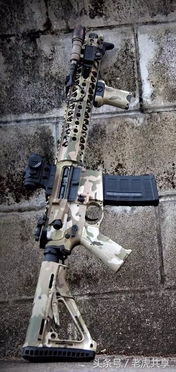
Before diving into the assembly process, it’s essential to have a basic understanding of the AR-15’s components. The AR-15 is a semi-automatic, gas-operated firearm with a lightweight, modular design. Its key components include the upper receiver, lower receiver, barrel, bolt carrier group, and magazine.
| Component | Description |
|---|---|
| Upper Receiver | The upper receiver is the housing for the barrel, bolt carrier group, and other upper components. It is typically made of aluminum or steel. |
| Lower Receiver | The lower receiver is the housing for the trigger assembly, magazine release, and other lower components. It is also typically made of aluminum or steel. |
| Barrel | The barrel is the tube through which the bullet travels. It is available in various lengths and calibers. |
| Bolt Carrier Group | The bolt carrier group is responsible for cycling the firearm. It includes the bolt, carrier, and gas key. |
| Magazine | The magazine holds the ammunition. There are various types of magazines available for the AR-15, including box magazines and drum magazines. |
Gathering the Necessary Tools
Assembling an AR-15 requires a set of specialized tools. Here’s a list of essential tools you’ll need:
- AR-15 assembly tool
- Hex wrenches (various sizes)
- Allen wrenches (various sizes)
- Pin punch
- Hammer
- Clamp
- Gun cleaning kit
Assembling the Lower Receiver
Start by assembling the lower receiver. Here’s a step-by-step guide:
- Insert the trigger assembly into the lower receiver and secure it with the appropriate screws.
- Install the magazine release and ensure it is functioning correctly.
- Attach the bolt carrier group to the lower receiver using the appropriate pins and screws.
- Install the buffer tube and buffer spring into the lower receiver.
- Attach the stock to the buffer tube using the appropriate screws.
Assembling the Upper Receiver
Once the lower receiver is assembled, move on to the upper receiver. Here’s how to do it:
- Insert the barrel into the upper receiver and secure it with the appropriate screws.
- Install the bolt carrier group into the upper receiver, ensuring the gas key is properly seated.
- Attach the handguard to the upper receiver using the appropriate screws.
- Install the bolt and bolt carrier group into the upper receiver, ensuring the bolt is fully seated.
- Attach the sights and other accessories to the upper receiver.
Finalizing the Assembly
After assembling both the upper and lower receivers, it’s time to finalize the assembly:
- Insert the magazine into the lower receiver and ensure it is functioning correctly.
- Check the firearm for any loose parts or misalignments.
- Perform a dry fire test to ensure the firearm is functioning properly.
- Clean and lubricate the firearm as needed.
Safety Precautions
Throughout the assembly process, safety should always be your top priority. Here are some important safety precautions to keep in mind:
- Always keep the firearm pointed in a safe direction. function pinIt() { var e = document.createElement('script'); e.setAttribute('type','text/javascript'); e.setAttribute('charset','UTF-8'); e.setAttribute('src','https://assets.pinterest.com/js/pinmarklet.js?r='+Math.random()*99999999); document.body.appendChild(e); }